Moving AWS CloudFormation resources between stacks
When Serverless Stack (SST) released v1.0 and created Functional Stacks, it made it so much simpler to have cross-stack references. I then started wanting to re-jig the infrastructure code to make it a lot easier to understand and start to move to smaller functional stacks instead of one large stack containing everything. Most resources can just be taken down and re-created, but there are some like DynamoDB Tables that you do not want to remove data from in production. So we will need to migrate it.
Here are the steps I did using SST to migrate the resources:
- Orphan the resource to remove
- Build the template for the stack with the resource added
- Use the AWS Console to import the stack using that template
Be sure to run through these steps in a development/staging environment first before running it in production, to make sure that no steps have been missed. And it is also good practice to backup any resources that is being touched so you can rollback if required.
Orphan the resource to remove
Orphaning a resource means to remove it from a stack, but it should still be in your AWS account.
Firstly, make sure that there are no other difference between your stack configuration and the deployed stack by running sst diff.

Then, update the retention policy for the resource you want to orphan to be RETAIN and deploy that using sst deploy.
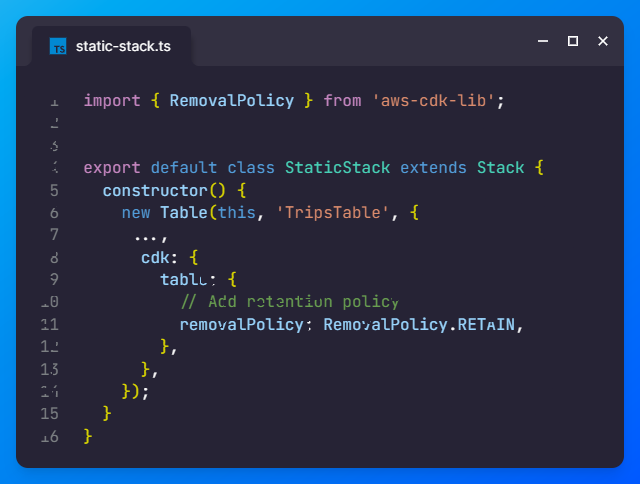
Lastly, remove the resource from the stack and run sst diff to check and make sure that only the table is being orphaned. Once it’s confirmed, you can run sst deploy to publish it.

If you go into the AWS Console, you should be able to see that the stack now no longer has the table, but if you go into the DynamoDB Table list, your table should still be there.
Build the template for the stack with the resource added
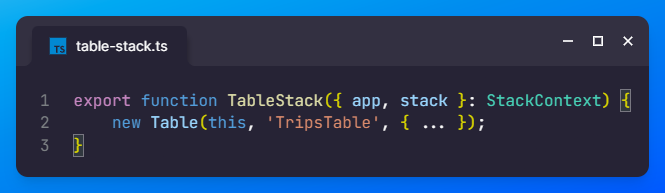
Now add the resource that was removed into the stack that you’d like it to be in.
Now, run sst build, do NOT run a deployment here as that will create a new table. Once the build has finished, go into .build/cdk.out and find your template JSON file, it should be called something {stage}-{appName}-{stackName}.templates.json. You would want to make a copy of this file and then open it in your text editor.
Once opened, you want to make sure that under SSTMetadata that all your constructs are referenced except for the resource being added in. In the example below, you would want to delete lines 11–23.
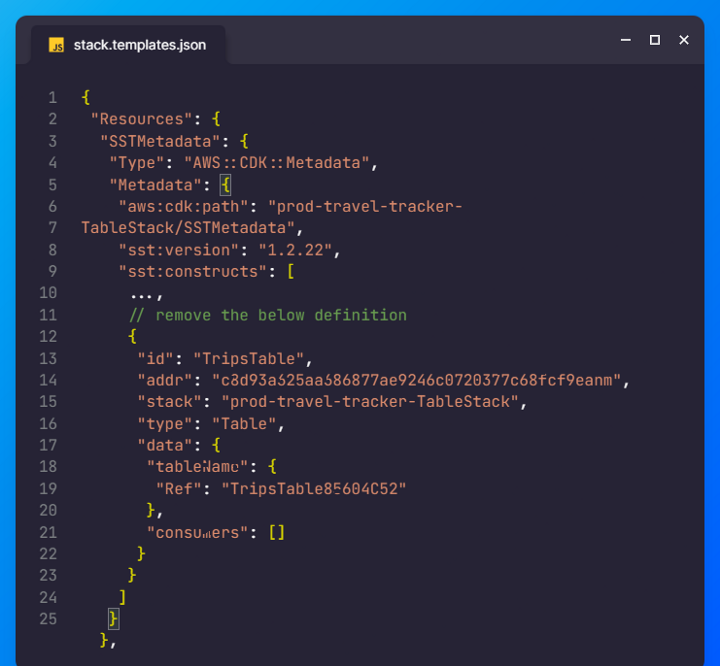
The reason for this is because CloudFormation will fail if you any other resource is created, updated or removed during the import process. So we want to make sure that only the resource imported is the one being added in the template.
Use the AWS Console to import the stack using that template
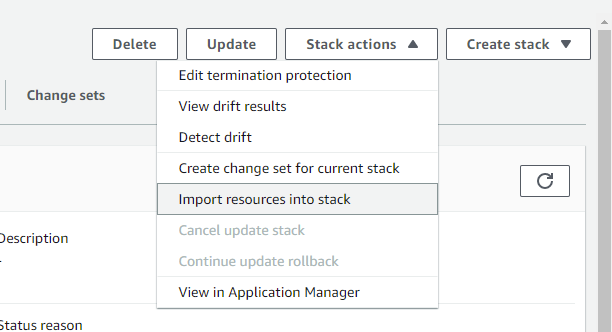
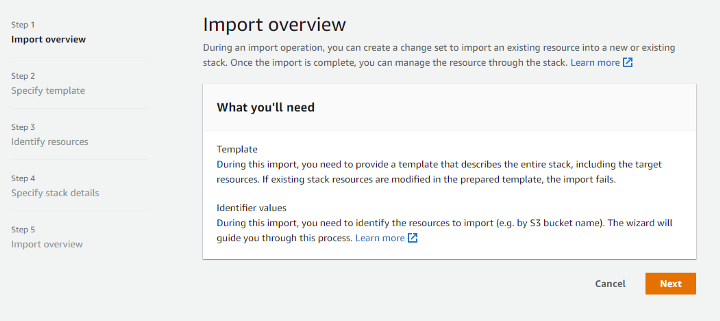
Open up the CloudFormation table stack in the AWS Console. In the top right, choose Stack actions > Import resources into stack.
On the first screen, click Next.
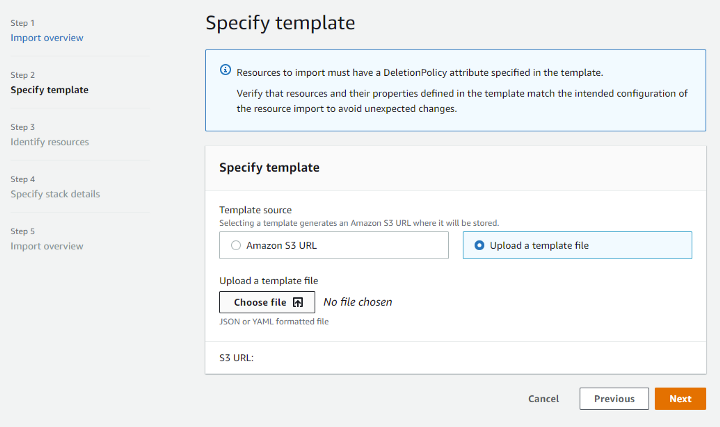
Then upload the adjusted JSON template file from the previous step. If your template file is too large, you may need to upload it to S3 and pass in the S3 URL. Hit Next once it’s uploaded.
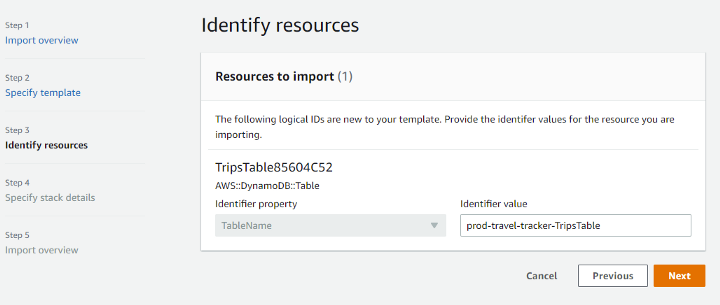
The table you’d like to import should appear here. You will now need to put in the Table Name as the Identifier value. If you created it from SST, it should be straight forward and follow the standard naming template. You can always go into your list of tables in DynamoDB to double check too. Hit next when you’re ready.
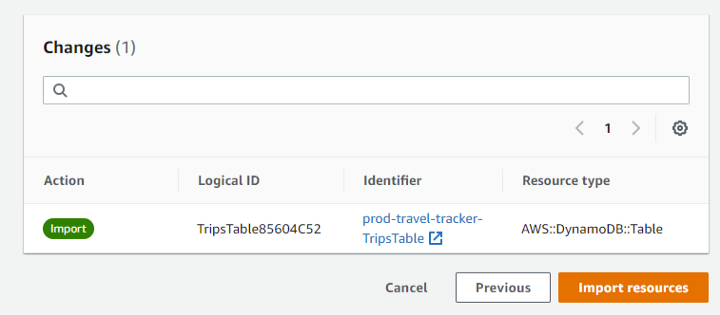
On the final step, scroll down to the bottom and you should see the table as the only resource to be imported. If this throws an error here, be sure to double check the Table Name in the previous step, or make sure that the SSTMetadata is not being updated at the same time. When you are ready, hit Import Resources.
The process should then start, and just wait for it to finish importing. Once that’s complete you can go back into your SST code and re-run sst diff to double check that no new resources will be created, as it has already been imported.